How to federate your on premise users to AWS using ADFS and SAML 2.0 PART 2
PART 1 is available by clicking HERE.
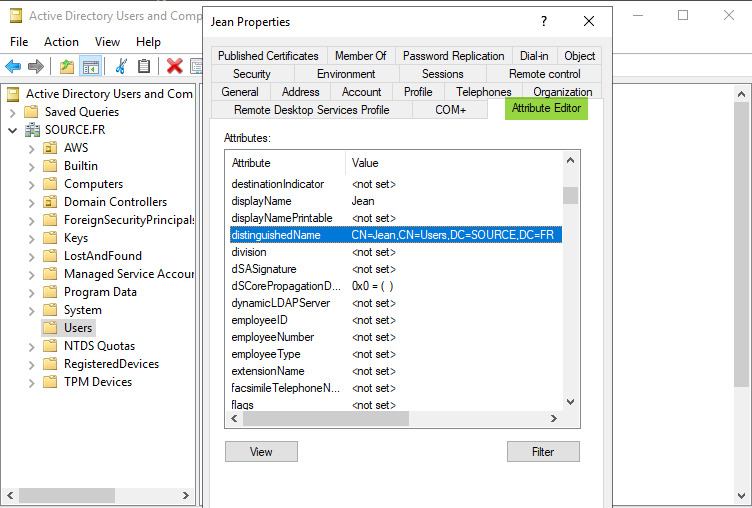
Quick recap: An Active Directory with ADFS was configured.
We created a user named Jean, added him to two previously created groups.
1. Configuring AWS
Now it's time to configure AWS.
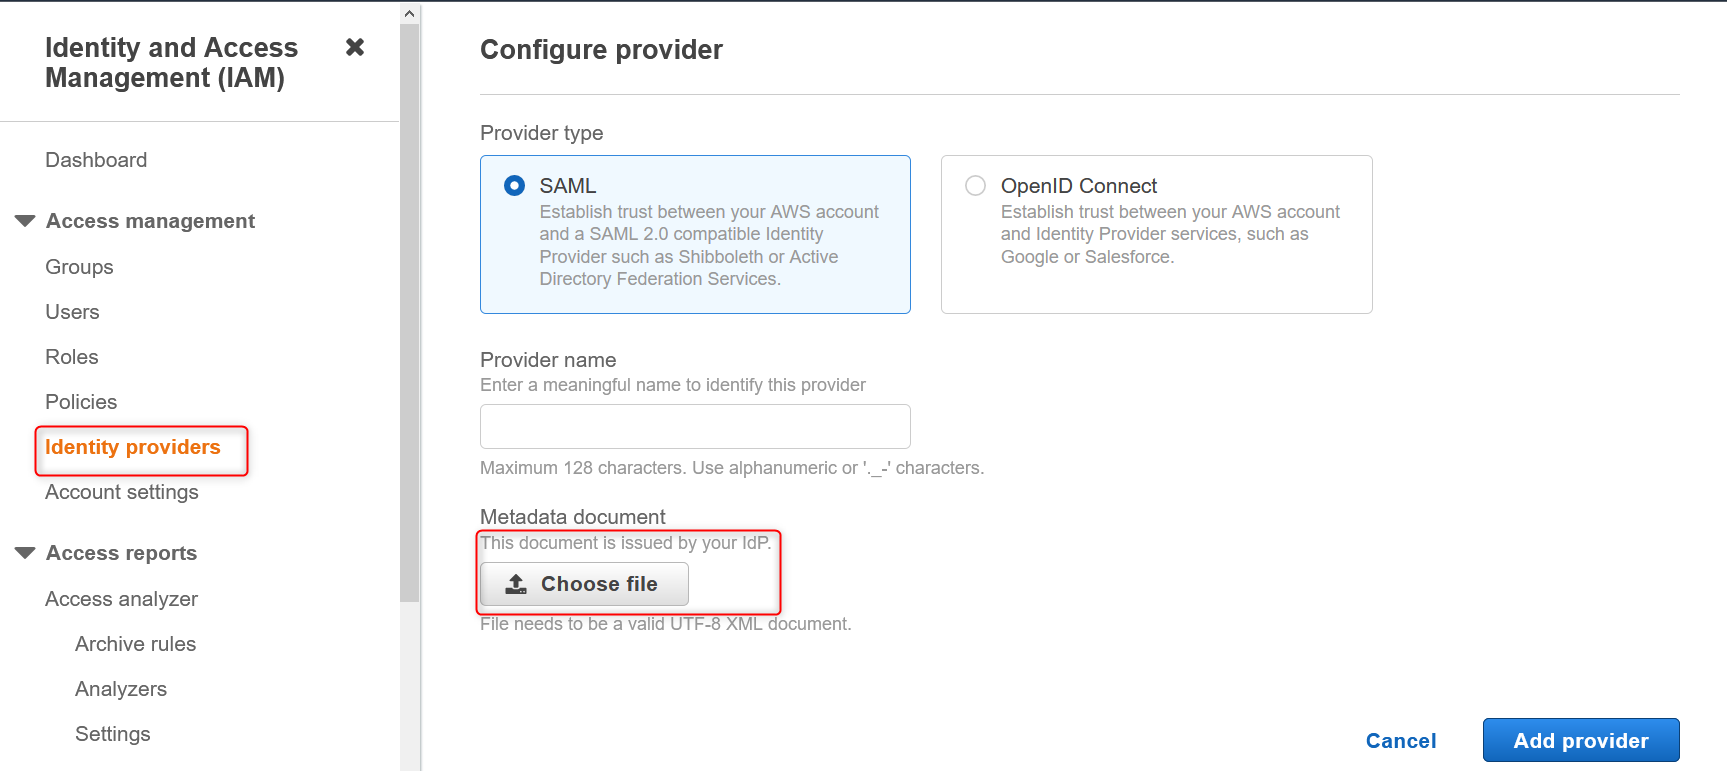
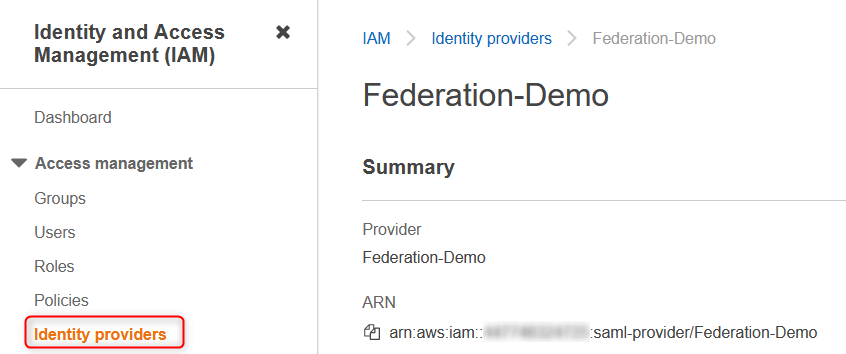
- Connect to the AWS Dashboard -->go to IAM-->Select Identity Providers
- Choose SAML, enter a Provider name and choose the XML metadata file. Type from your AD https://<yourservername>/FederationMetadata/2007-06/FederationMetadata.xml to get the file.
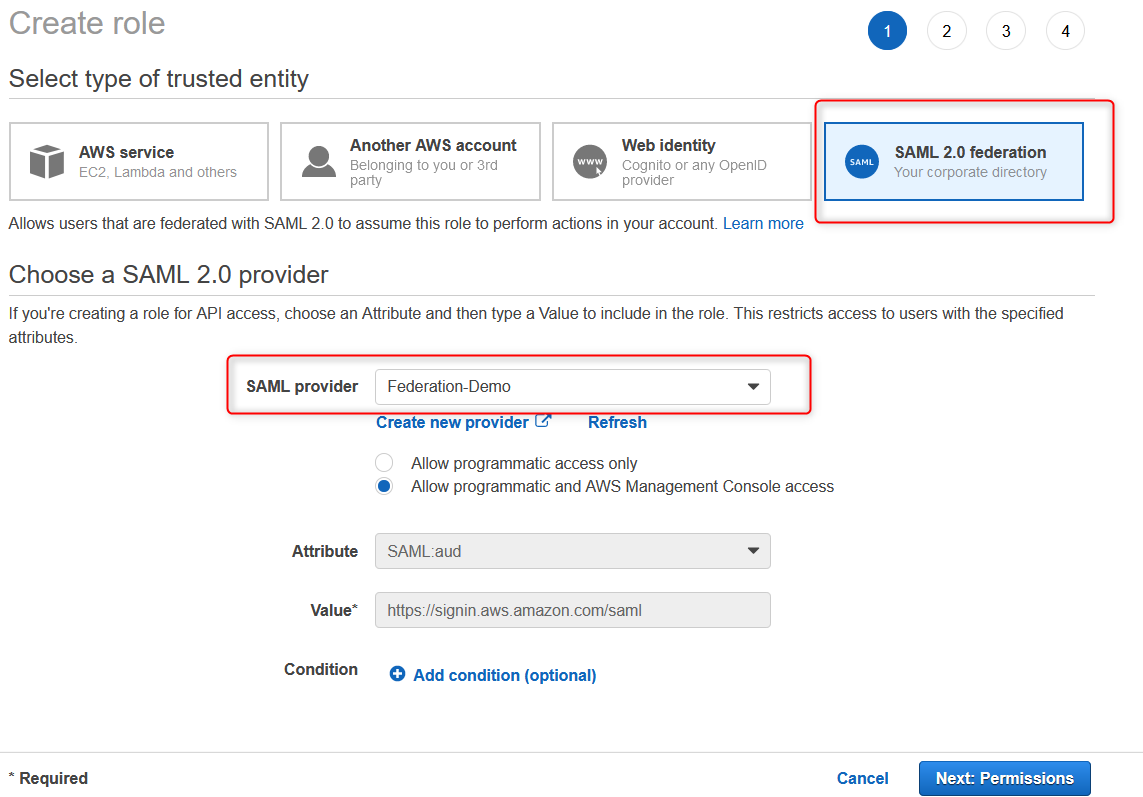
Once finished, create two IAM roles by choosing the option SAML and the Identity provider (SAML provider) we made earlier.
We shall call our roles AWS-PROD-ADMIN and AWS-PROD-DEV.
Putting AWS before the name is for a good reason I'll explain later (see the error #3 in the section Bugs and Errors below.
These names look familiar because they are the same as our 2 AD groups created at the beginning (PART 1)
Summary: In layman's terms, we gave authorization for our ADFS (The Identity Provider here) to communicate and be used in AWS. We created two roles that our future users will get their permissions from, which are link with the AD groups on-premise.
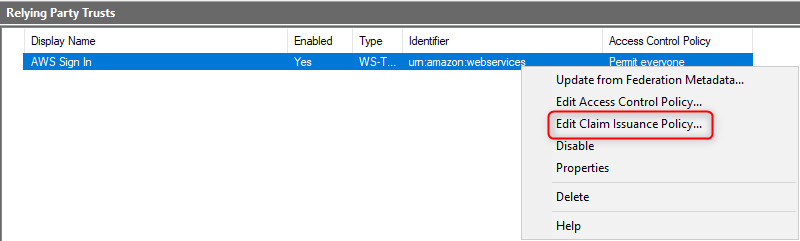
2. Configuring AWS in ADFS as a Trusted Relying Party
AWS trust this Identity Provider (ADFS), now we also have to do it the other way, meaning ADFS needs to trust AWS.
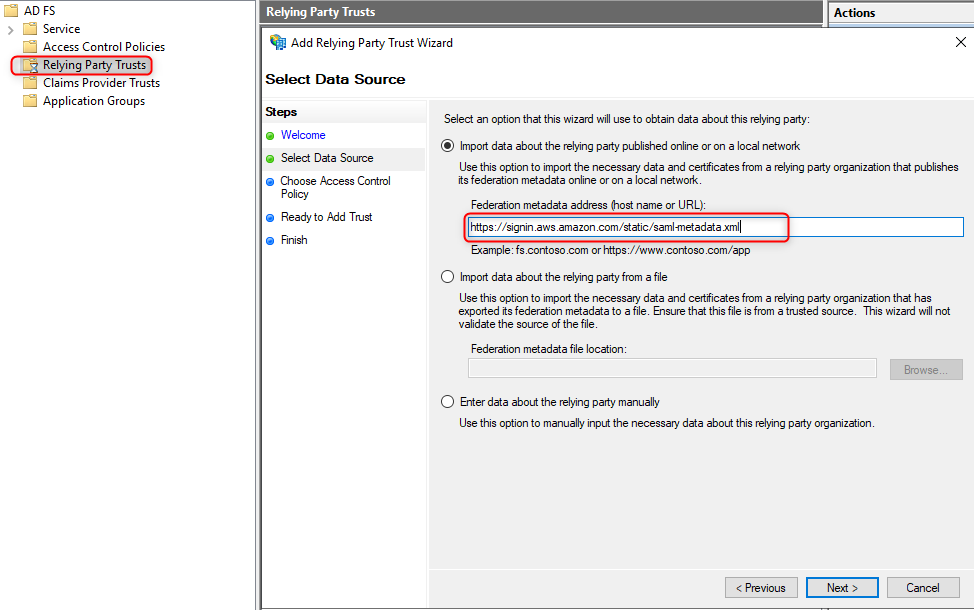
- From the ADFS Console, right-click relying party trust and next
- Add https://signin.aws.amazon.com/static/saml-metadata.xml like below.
- Set the display name and click Next.
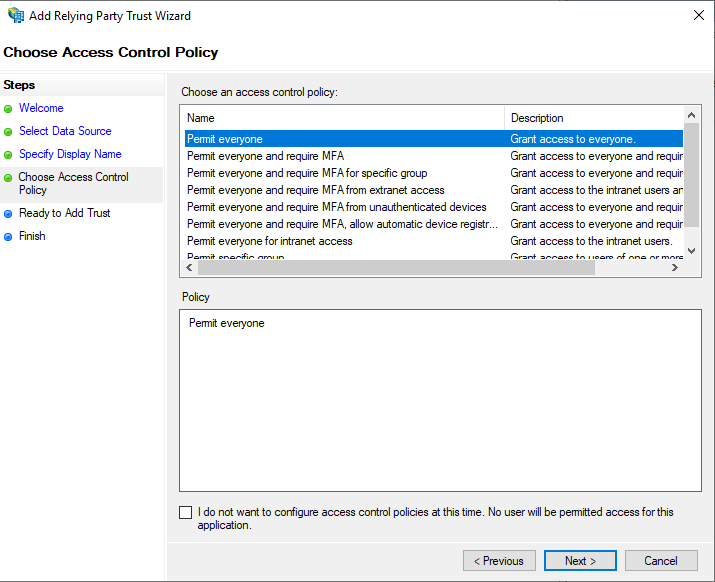
- For testing purposes, we will permit all users. We can configure an MFA authentification if needed.
- After this, breeze through the end.
AWS is now a trusted relying party in ADFS.
3. Configuring the Claim Rules for AWS
The claim rules are elements needed by AWS like (NameId, RoleSessionName, and Roles) that ADFS doesn't provide by default.
- Right-click on the relying party just created and then Claim Issuance Policy
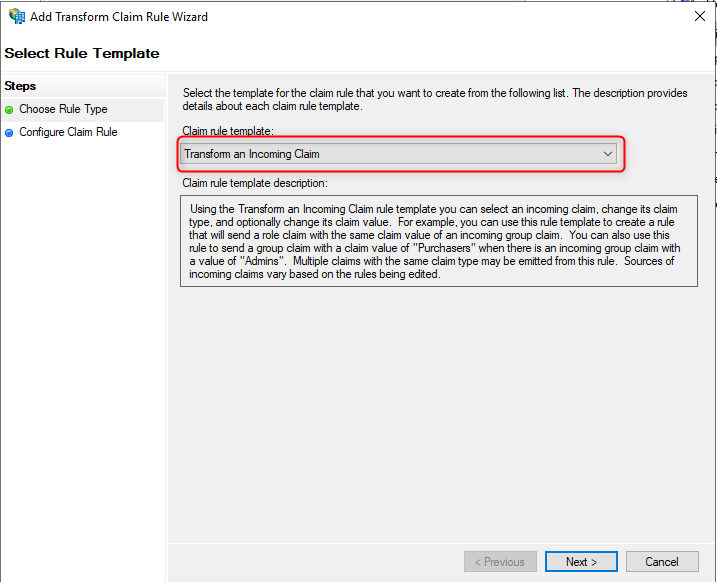
Adding NameId
- Click Add Rule below the dialog box.
- Select Transform an Incoming Claim, then Next.
- Add the following settings
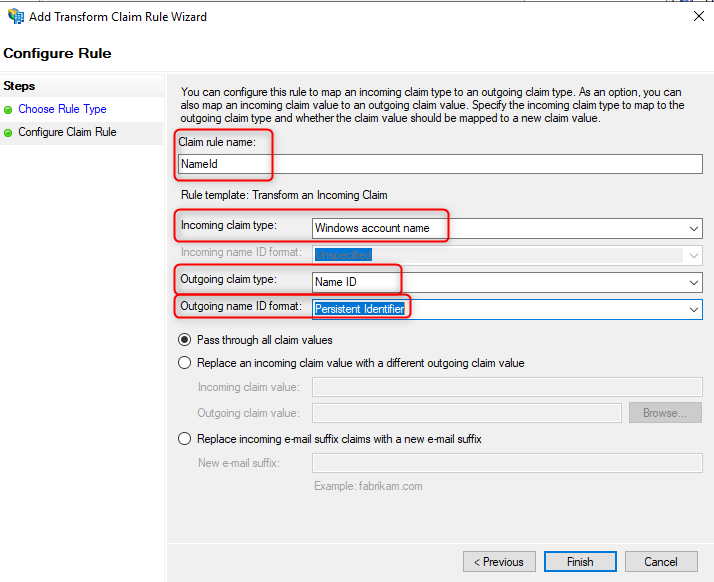
- Click Finish.
Adding RoleSeesionName
- Click Add Rule
- Select Send LDAP Attributes as Claims
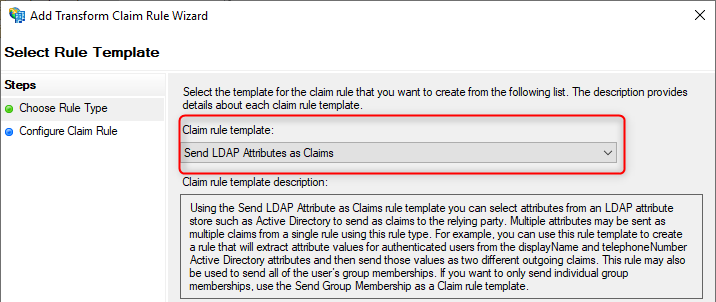
- Add the following settings:
Claim rule name: RoleSessionName
Attribute store: Active Directory
LDAP Attribute: E-Mail-Addresses
Outgoing Claim Type: https://aws.amazon.com/SAML/Attributes/RoleSessionName
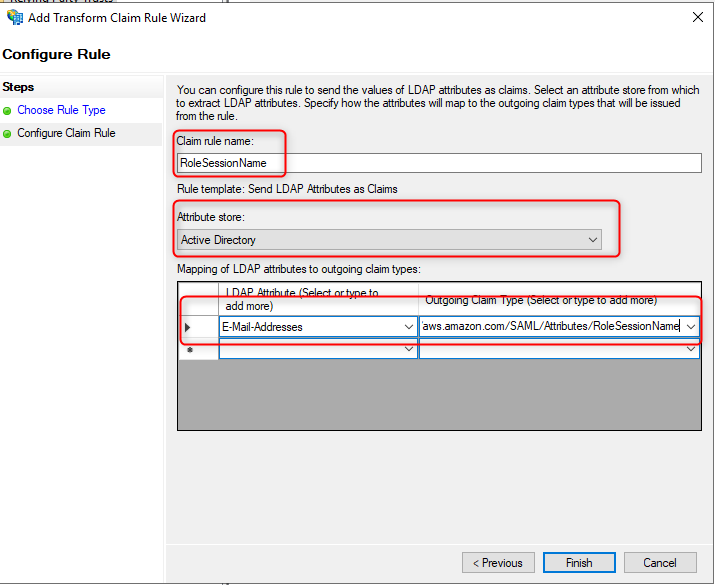
- Click Finish.
Now we only need to add the Role attributes to finish, but I'll explain what will be happening.
The next two claims are custom made. The first one will get all the groups of the authenticated user (when authenticating on the ADFS page), while the second rule will do the transformation into the roles claim by matching the role's names.
Hope it's clear!
Adding Role Attributes
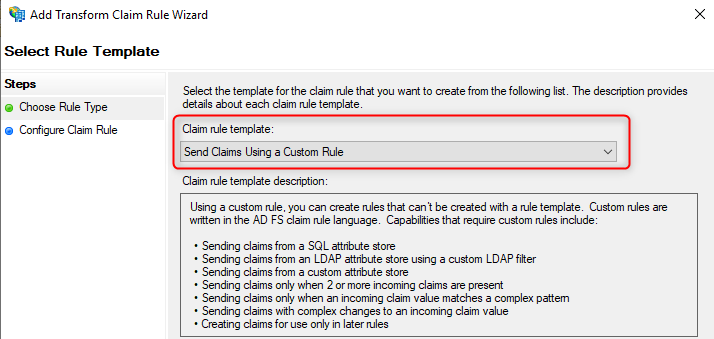
- Click Add Rule
- Select Send Claims Using a Custom Rule and click Next.
- For the name type Get AD Groups and in Custom Rule, enter the following:
c:[Type == "https://schemas.microsoft.com/ws/2008/06/identity/claims/windowsaccountname", Issuer == "AD AUTHORITY"]
 => add(store = "Active Directory", types = ("https://temp/variable"), query = ";tokenGroups;{0}", param = c.Value);
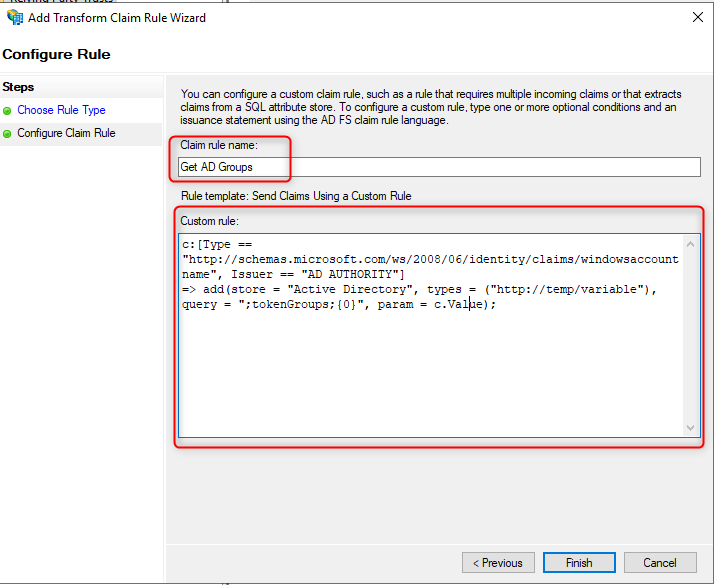
- Click Finish.
- Click Add Rule again
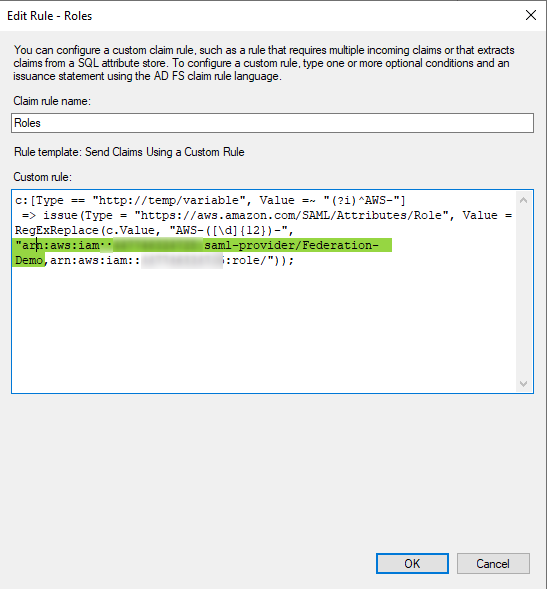
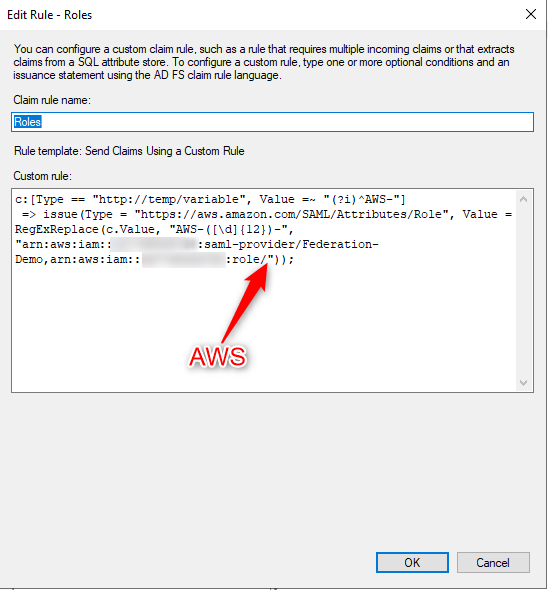
- Repeat the same step but the Claim rule name would be Roles and Custom rule is:
c:[Type == "https://temp/variable", Value =~ "(?i)^AWS-"] => issue(Type = "https://aws.amazon.com/SAML/Attributes/Role", Value = RegExReplace(c.Value, "AWS-", "arn:aws:iam::123456789012:saml-provider/Federation-Demo,arn:aws:iam::123456789012:role/"));
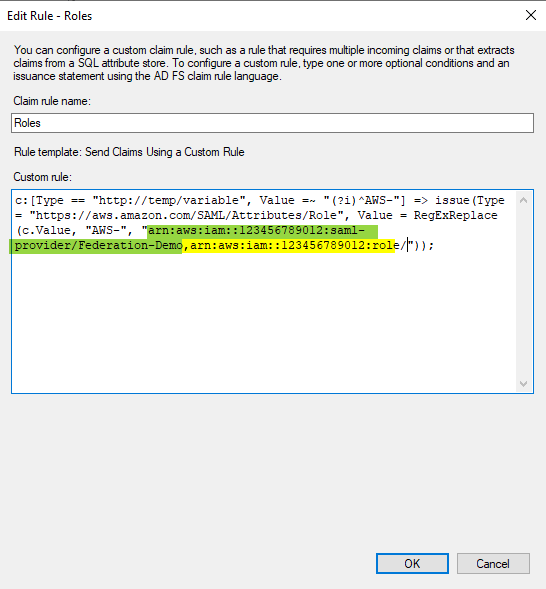
Make sure you add the correct ARN for the identity provider (green) which is here:
Same for the role's ARN (yellow)

4. Testing
- Go to this address: https://localhost/adfs/ls/IdpInitiatedSignOn.aspx in your domain. If you're getting an error while trying to access this page, you might have the SignOn option deactivate.
Open a Powershell Administrator shell and enter :
Get-AdfsPropertiesCheck that the option EnableIdpInitiatedSignOnPage is True.
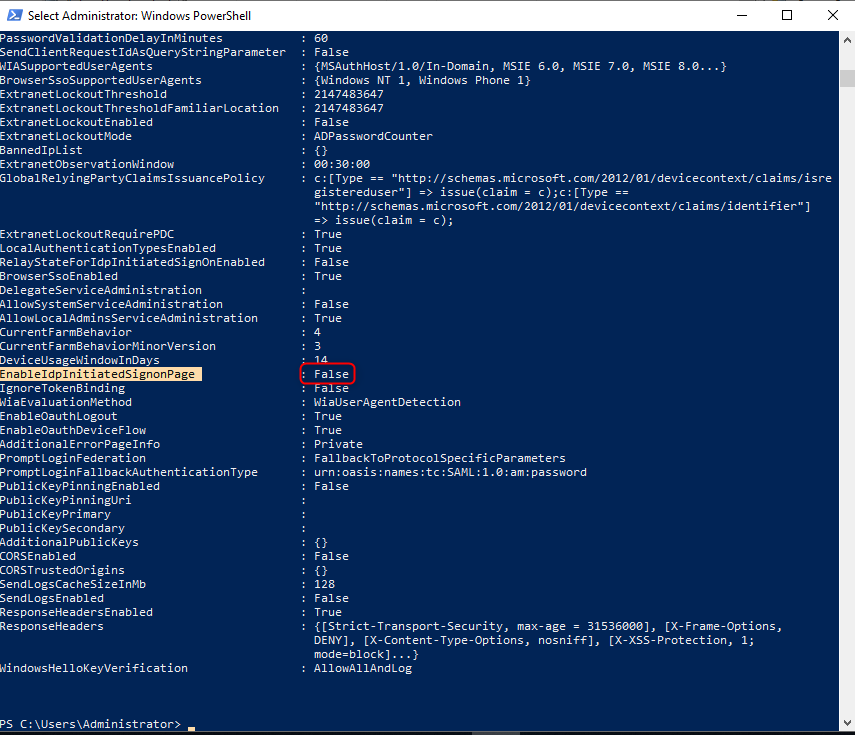
To set it to True:
Set-Adfsproperties -enableIdPInitiatedSignonPage $trueOnce done, you can restart the service:
Restart-Service adfssrv- Select Sign in to one of the following sites (second option):
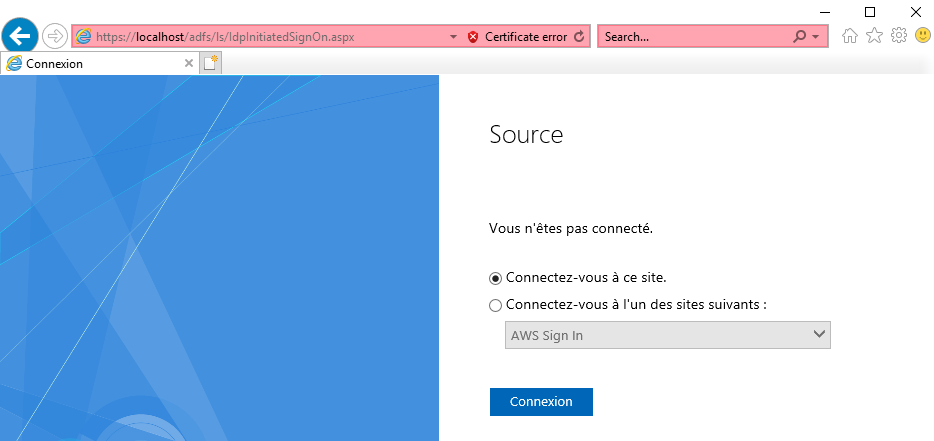
Some pages are in French since I'm French :).
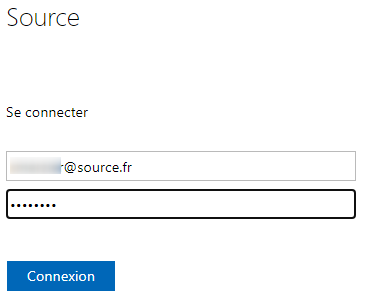
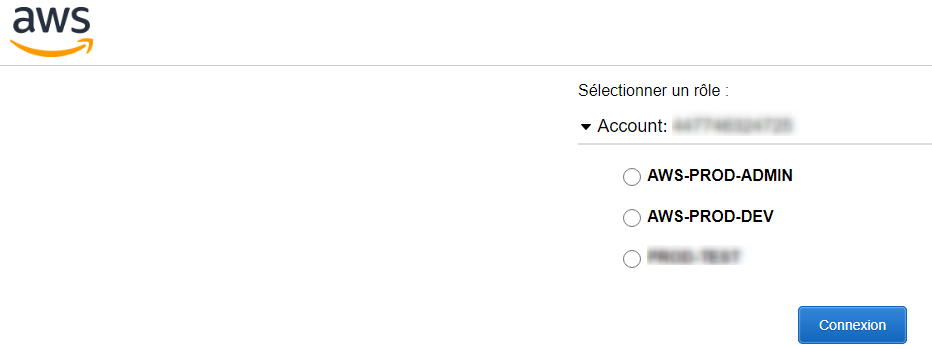
- You'll be prompt to enter an account (Jean's account created earlier)
Source is my domain's name.
- Select the role you want to sign-in with (If mapped to only a role, you'll skip this page and go directly to AWS).
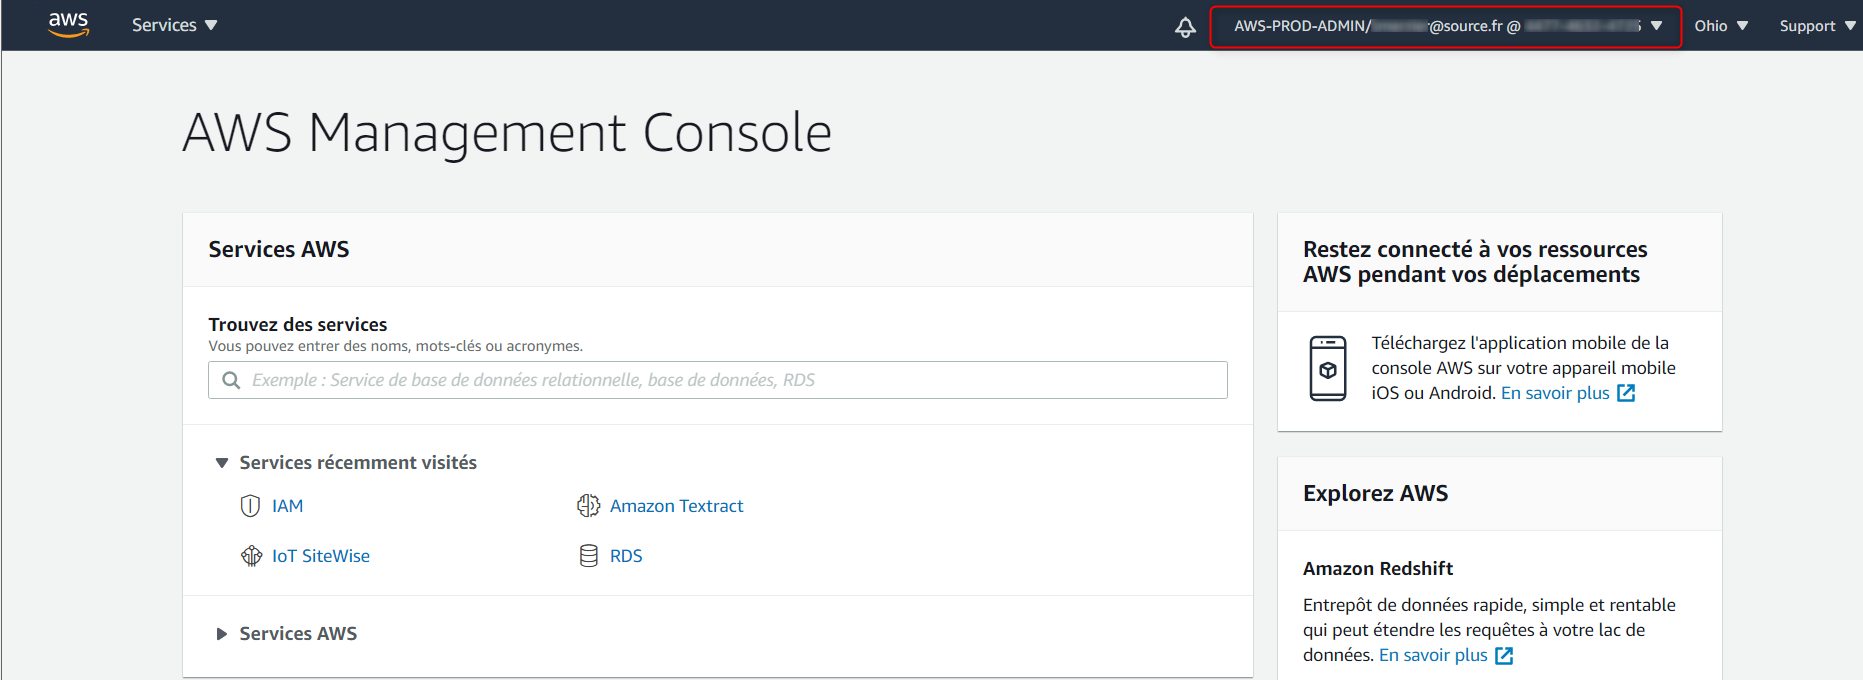
- Congratulations!, you can now see your role and the user you are Sign-in with :)
5. Bugs and Errors
Error #1: Specified provider doesn't exist.
This error is due to the provider's ARN in the issuance's Claims being faulty.
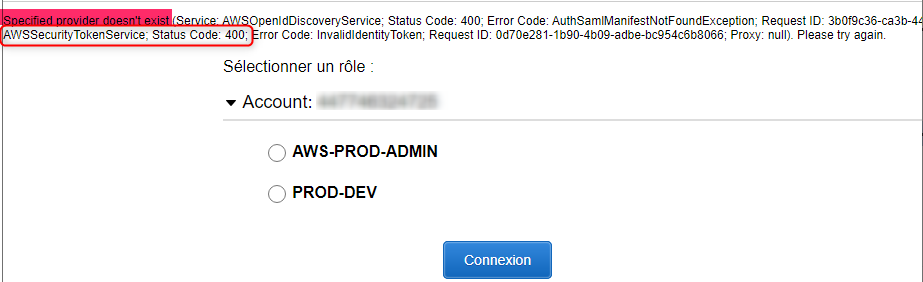
Solution: Check if everything is correctly entered for the Identity Provider we created on AWS at the beginning.
Error #2: Error: RoleSessionName is required in AuthnResponse
Error due to the AD user not having some necessary attributes, which are:
- distinguishedName
- sAMAccountName
- userPrincipalName
Solution: Checking that each of those attributes is correctly filled.
Some of those options need you to activate the Advanced Features of the Active Directory.
Error #3: Not authorized to perform sts:AssumeRoleWithSAML

This is a matching name error of the Group's name and the Role's name on AWS you're trying to connect with.
Remember what I've told you in the Configuring AWS section about why we put AWS before the name? This is it!
The Roles we created in AWS are the following, and we're interested in the highlighted role below :

I've purposely created an AD's Group without AWS (PROD-TEST) at the beginning to show you.
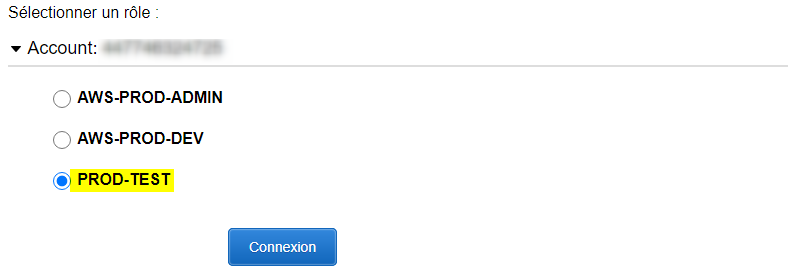
The two names are not matched.
Solution: Make them matched by either changing the name of your AD Group by adding AWS (example: AWS-845125856994-AWS-PROD-TEST) or adding an AWS tag in the Role's issuance claim here:
I'll be glad to answer any questions or help if needed by contacting me.