How to create a fully scalable, highly available, multi-server web application on AWS with Terraform
Check the code on GITHUB --> https://github.com/bobocuillere/HA-web-application-workshop-AWS
Nowadays, using Terraform or any Infrastructure as Code services is vital, especially in the cloud computing world where everything is "disposable," you could create an entire infrastructure in minutes and made it available globally without waiting weeks to do it like before.
Terraform come into play by allowing to rapidly provision and manage infrastructure.
This blog post will entirely transform the "The AWS Highly available web application" workshop into terraform. You can find it by following this link.
(https://ha-webapp.workshop.aws/introduction/overview.html).

Why? Because I don't want to waste 4 hours each time I want to do it, and more importantly, it provides versioning, meaning I can rapidly see, change the infrastructure or even destroy it rapidly.
1. Architecture
Prerequisites:
- AWS Account
- Terraform 0.12 or later, I'm using 0.14.9

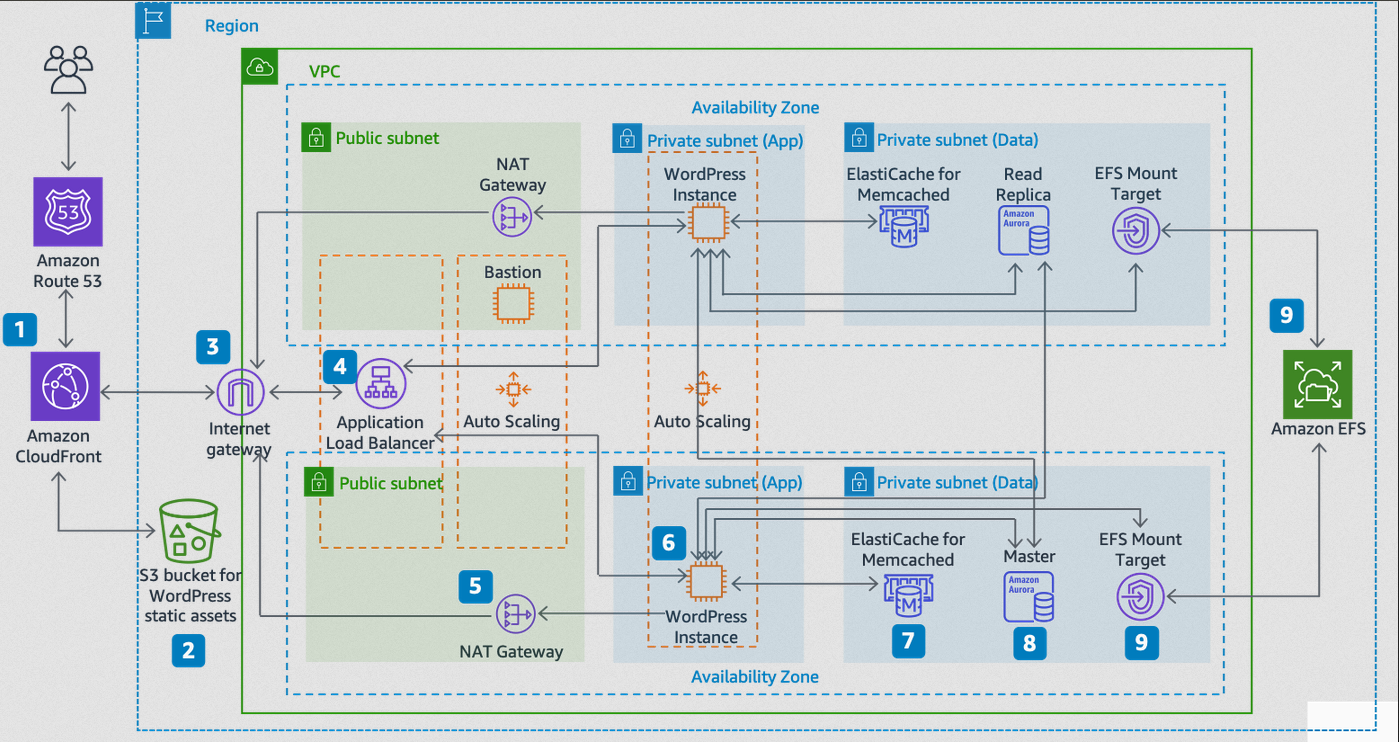
So let's start by explaining the architecture!
The workshop doesn't use Route 53 or a CDN.
We will start with number 3.
- 3) The Internet Gateway will allow communication with the different components (instances) in your VPC.
- 4) The Application Load Balancer is here to distribute the traffic across an auto-scaling group across the EC2 instances in the different AZs.
- 5) Nat Gateways provides our instances in the Application subnets a way to reach the internet but not the other way around.
- 6) WordPress is installed and run in an auto scaling group.
- 7) Elasti Memcached is a way to add a caching layer for the frequently accessed data.
- 8) RDS Aurora, Serverless database on AWS.
- 9) File sharing system on AWS.
The workshop is to build a highly available web application through regional services and availability zones.
We have six subnets in total (3 in each AZs).
- Public subnets: The only subnet that directly links to the internet, a bastion host could be placed here.
- Application subnets: This is where the WordPress instances will be.
- Data subnets: This is where the database is located.
Every part is redundant and resilient to failure.
2. Terraform
Find the terraform code by following this link :GitHub for the project
So how the code works?
We have 11 files in total:
- 7 of them is for each lab of the workshop
- VARS and a TFVARS file
- An output file
- And the template file for the bash script.

Start by changing your AWS_PROFILE name in the TFVARS.
Your profile name is found at %USERPROFILE%\.aws\credentials (Windows) and ~/.aws/credentials (Linux & Mac).

The variable named "linux_ami" is a RHEL 8 image.
The AMI has to be changed if you use another region other than us-east-1.

You can change any other variable to suit yourself but let's keep it vanilla as AWS put it in the workshop.
Everything is set up to launch terraform.
Open a PowerShell shell and type:
terraform initand
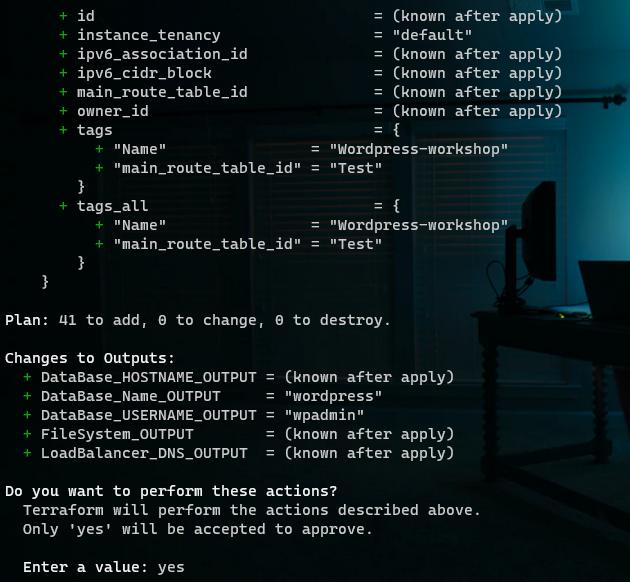
terraform apply
The entire workshop will be created (resources, security groups, configurations, etc.).
When it's finished, you'll click on the LoadBalancer_DNS_OUTPUT to access the website.

I have modified the script in the workshop because it didn't work (many dependencies and packages failed), so it's just the default Apache homepage.
You will have to change the bash script if you want more of it, my goal was to transform the workshop into terraform.
